If your car suddenly flashes the “Check Engine” light or starts acting weird, it’s a clear sign that something is wrong under the hood. Instead of rushing straight to a mechanic, you can diagnose the issue yourself using an OBD scanner or OBD2 scanner. These handy tools are easy to use, even for beginners, and can help you understand what’s really going on with your car. In this blog, let’s break down how to use an OBD scanner step-by-step, so you can quickly check car faults and even reset the check engine light confidently.
What is an OBD Scanner?
Before you start, let’s understand the basics. OBD stands for On-Board Diagnostics, a system built into modern cars that monitors performance and detects issues in the engine, transmission, exhaust, and more.An OBD scanner or car diagnostic tool plugs into your car’s OBD port to read data from the onboard computer. It helps you scan car error codes, identify problems, and sometimes clear minor faults without visiting a workshop.
There are mainly two types
- Wired OBD scanners: They connect directly through a cable.
- Bluetooth OBD2 scanners: They pair with your phone using an OBD app connection, making it easier to view and share reports digitally.
Step 1: Locate the OBD Port
Your first task is to find the OBD port location. In most cars, it’s under the dashboard, near the steering wheel, or slightly above the pedals. Some cars might hide it behind a small cover.
If you’re not sure, check your owner’s manual—it will tell you exactly where it is. Finding this port is key because that’s where your car code reader connects.
Step 2: Connect the OBD2 Scanner to the Car
Once you’ve found the port, plug in your OBD2 scanner. For Bluetooth OBD2 scanners, you’ll need to turn on the ignition and pair it with your smartphone via the companion app (like Torque, Car Scanner, or OBD Auto Doctor).
For wired scanners, just connect and switch the car to “ON” mode without starting the engine. The tool should light up or show a connection message on-screen.
This is the starting point of your OBD scanner tutorial—getting that connection right ensures accurate readings.
Step 3: Access the Diagnostic Menu
After connecting, go to the scanner’s main menu. Choose “Diagnostics” or “Read Codes.”
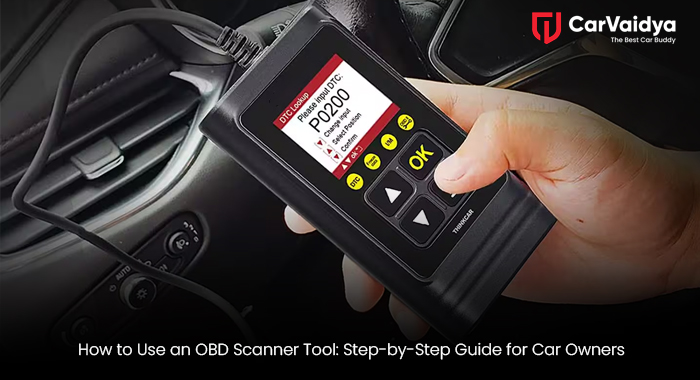
The OBD diagnostic tool will start communicating with your vehicle’s ECU (Engine Control Unit). Within a few seconds, it’ll display error codes—these are known as OBD codes or DTCs (Diagnostic Trouble Codes).
These codes usually start with a letter (like P, B, C, or U) followed by four digits.
- P stands for Powertrain (engine/transmission issues)
- B for Body (airbags, doors, seats)
- C for Chassis (brakes, suspension)
- U for Network (communication errors)
Understanding these codes is how you check car faults effectively.
Step 4: Read and Interpret OBD Codes
Now that you have the codes, it’s time to know what they mean. Most OBD apps or scanners will automatically show a short description, like “P0300 – Random/Multiple Cylinder Misfire Detected.”
If your scanner doesn’t explain the code, you can look it up online or on the manufacturer’s website.
This is the real power of a car engine diagnostic tool—it helps you detect problems early, such as a bad sensor, faulty spark plug, or emissions issue, before they turn into costly repairs.
Step 5: Fix or Reset the Problem
Once you’ve read the codes, you can decide on the next step
- Minor issues: Some can be fixed at home, like tightening the fuel cap or cleaning the air filter.
- Major faults: For complex codes, it’s best to get a mechanic’s help.
After fixing the issue, go back to the OBD tool and select “Clear Codes” or “Erase Codes” to reset the car's check engine light.
Remember, clearing the codes without solving the actual issue will make the light come back on soon.
Step 6: Disconnect and Test Drive
When done, safely unplug the OBD scanner and start your car. Check if the warning light stays off. A short test drive helps ensure the system has reset and the issue is resolved.
This step also verifies that your OBD app connection worked correctly and that the scanner provided accurate results.
Benefits of Using an OBD Scanner
Using an OBD tool isn’t just for mechanics—it’s a must-have for every car owner today. Here’s why:
- Saves time and money on unnecessary garage visits
- Improves car maintenance by catching issues early
- Increases awareness of how your car’s system works
- Prevents breakdowns by monitoring performance regularly
If you’re into DIY car care or simply want to know what’s happening under your hood, investing in an OBD2 scanner is one of the smartest decisions you can make.
CarVaidya Tip for Smarter Car Care
Platforms like CarVaidya make car maintenance easier by providing expert guidance on using OBD tools, understanding engine codes, and knowing when to visit a service center. Whether it’s regular check-ups or diagnosing warning lights, learning how to use an OBD tool can save you stress and money in the long run.
Learning how to use an OBD scanner isn’t complicated—it’s empowering. With just a few steps, you can detect car faults, read OBD codes, and even reset the check engine light on your own. From simple fuel cap warnings to engine misfires, an OBD diagnostic tool gives you control and confidence as a car owner. So next time your dashboard flashes a warning, grab your OBD2 scanner, follow this step-by-step guide, and take charge of your car’s health. Because staying informed is the first rule of smart car maintenance.
You can read some other articles
Essential Checks Before Buying a Luxury Car in India
Doorstep Car Wash: Transforming Car Care with Convenience
Can a Petrol GDI Engine Work on CNG? A Comprehensive Guide
 By CarVaidya
0 Comments