How to Check and Adjust the Wheel Alignment of Your Car at Home
 By CarVaidya
- 20 Jun 2024
How to Check and Adjust the Wheel Alignment of Your Car at Home
Wheel alignment, also known as tire alignment, is a essential, position, of vehicle maintenance. legitimate, alignment reassure that your car handles completely, tires wear consistently, and you enjoy a smooth driving consistently. Misalignment can cause uneven tire wear, poor handling, and decreased fuel evenly. While profitable alignment services are evenly, you can check and adjust your car’s wheel alignment at home with the right tools and a bit of patience. Here's a detailed guide on how to do it.

Understanding Wheel Alignment
Wheel alignment associate settling the angles of the wheels so that they are coordinate to each other and crosswise to the ground. The main alignment angles are:
Camber
The tilt of the wheel inward or noticeable from the top. confident camber system, the top of the wheel leans outward, while negative camber means it leans inward.
Toe
The direction the wheels point relative to each other. Toe-in means the front of the wheels are closer together than the rear, while toe-out means the front of the wheels are more apart.
Caster
The angle of the steering axis when viewed from the side of the vehicle. Positive caster tilts the top of the steering axis toward the driver, and negative caster tilts it away.
Tools You Will Need
- Jack and jack stands
- Wrenches and sockets
- Tape measure
- String or fishing line
- Carpenter’s level or camber gauge
- Marker or chalk
- Wheel chocks
- Pen and paper
Step-by-Step Guide to Checking and Adjusting Wheel Alignment
1. Preparation
Find a Flat Surface
Park your car on a level superficial. establish there is suitable space around the vehicle to work easily.
Secure the Vehicle
Use wheel chocks to prevent the car from rolling.
Loosen the Lug Nuts
lightly, loosen the lug nuts of the front wheels but do not remove them.
Lift the Car
Use a jack to lift the front of the car and place jack stands under the car for support. Lower the car onto the stands and remove the wheels.
2. Checking the Camber
Attach the Camber Gauge
Attach a camber gauge or a carpenter’s level vertical to the wheel hub.
Measure the Camber Angle
Read the camber angle on the gauge. analyze it to your vehicle’s specifications, which can be found in the owner’s manual or online.
Adjust the Camber
If the camber is off, adjust it by extrication the strut bolts and moving the top of the wheel in or out as essential. Tighten the bolts once the correct angle is perfect.
3. Checking the Toe
Set Up the String Line
Tie a string around the rear wheels and extend it to the front wheels, ensuring it is tight and level. The string should touch the rear edges of the rear tires.
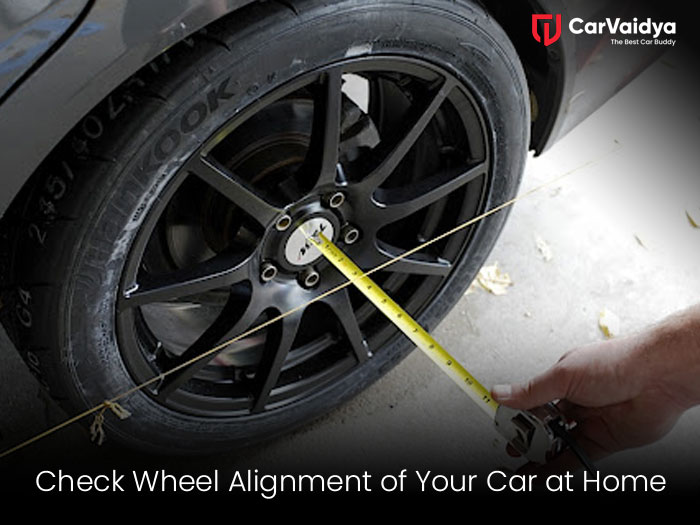
Measure the Distance
Use a tape measure to measure the distance between the string and the front and rear edges of the front tires.
Toe-in
If the distance is shorter at the front of the tires than the rear, you have toe-in.
Toe-out
If the distance is greater at the front of the tires than the rear, you have toe-out.
Adjust the Tie Rods
To correct the toe, loosen the tie rod locking nuts. Turn the tie rods to move the front of the tires in or out until the distances are equal. Tighten the locking nuts once the alignment is correct.
4. Checking the Caster
Locate the Caster Angle
The caster angle is more challenging to measure without professional tools. However, you can make a rough estimate by examining the tilt of the steering axis from the side.
Adjust the Caster
If you notice significant misalignment, you may need to adjust the control arms or the strut mounts. This process can be complex and might require professional assistance.
5. Reassembly and Test Drive
Reattach the Wheels
Put the wheels back on and hand-tighten the lug nuts.
Lower the Car
Use the jack to lift the car marginally,, remove the jack stands, and lower the car to the ground.
Tighten the Lug Nuts
Fully tighten the lug nuts in a interlaced pattern to assure even squeeze.
Test Drive
Take your car for a short drive to check the handling. Pay attention to how the car steers and if it pulls to one side. If it does, you may need to reassess and adjust the alignment.
Tips and Precautions
Safety First
Always prioritize safety by securing the car properly and using jack stands.
Patience is Key
Wheel alignment adjustments can be time-consuming. Take your time to make precise measurements and adjustments.
Double-Check
After each adjustment, double-check the measurements to ensure accuracy.
Professional Help:
If you encounter difficulties or if the alignment is significantly off, seek professional help. Proper alignment is crucial for safe driving.
Checking and atoning your car’s wheel alignment at home can be a productive DIY design, helping you save money and enroll also about your vehicle. With the right tools and careful reflection, to detail, you can produce adequate, results. However, for the best efficiency and safety, efficient alignment services are always recommended. Proper wheel alignment ensures better approach, enhanced, tire life, and a smoother driving experience.
You can read some other Articles
Enhancing Your Driving Experience Installing a Sunroof in Your Car
How to Choose the Right Car Insurance Coverage for Your Needs

0 Comments