Removing and Preventing Moisture in Car Tail Lights and Headlights
 By CarVaidya
- 27 Jun 2024
Removing and Preventing Moisture in Car Tail Lights and Headlights
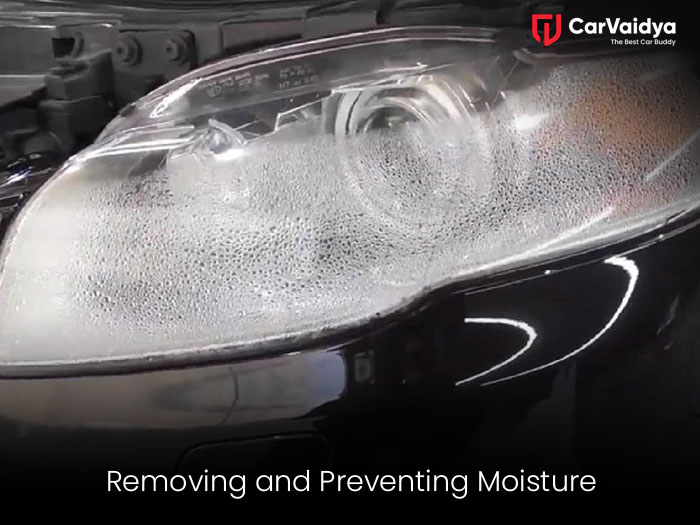
Moisture aggregation in car tail lights and headlights is a natural problem that can lead to trimmed visibility, electrical issues, and even damage to the light fixtures. Removing this moisture and inordinate, it from coming back is crucial for maintaining your vehicle's safety and appearance. This guide will walk you through the steps to remove moisture from car tail lights and headlights and offer tips to prevent future moisture escalation.
Understanding the Causes of Moisture Accumulation
Before diving into the removal process, it’s important to apprehend why moisture assemble in the first place. Common causes include
- Damaged Seals: Over time, the seals around your lights can deteriorate, allowing water to seep in.
- Cracks and Chips: Physical damage to the lights can create entry points for moisture.
- Temperature Changes: Rapid changes in temperature can cause condensation to form inside the lights.
- Poor Assembly: Improperly installed lights may not be fully sealed.


Tools and Materials Needed
- Screwdriver set
- Hairdryer or heat gun
- Silica gel packets
- Sealant (silicone-based)
- Cleaning cloths
- Rubbing alcohol
- Protective gloves
- Replacement gaskets (if necessary)
Step-by-Step Guide to Removing Moisture
1. Access the Lights
To begin, you'll need to access the tail lights or headlights. This typically involves:
- Opening the hood (for headlights) or the trunk (for tail lights).
- Removing any covers or panels that obstruct access to the light fixtures.
- Unscrewing and carefully removing the light assembly from the vehicle.
2. Inspect for Damage
Examine the light assembly for any visible damage, such as cracks, chips, or worn seals. This step is crucial as repairing any damage will prevent future moisture issues.
3. Remove the Bulbs
Carefully remove the bulbs from the light assembly. This helps prevent any damage to the bulbs during the drying process and allows for more thorough moisture removal.
4. Drying the Moisture
There are several methods to remove the moisture from inside the lights:
Using a Hairdryer or Heat Gun
- Set the hairdryer or heat gun to a low or medium setting.
- Direct the warm air into the light assembly for several minutes. Keep the device moving to avoid overheating any area.
- Monitor the moisture as it evaporates. This method works well for minor condensation.
Using Silica Gel Packet
- Place a few silica gel packets inside the light assembly.
- Leave them overnight or for several hours. Silica gel is highly effective at absorbing moisture.
Baking in an Oven (only for durable plastic or glass assemblies)
- Preheat the oven to a low temperature (around 100°F or 38°C).
- Place the light assembly in the oven for 15-20 minutes. Ensure the temperature is low to prevent any damage to the plastic parts.
5. Cleaning the Interior
Once the moisture is removed, clean the interior of the light assembly:
- Use a clean cloth and rubbing alcohol to wipe away any residual moisture or dirt.
- Allow the assembly to air dry completely before reassembling.
6. Inspect and Replace Seals
Check the seals around the light assembly. If they are worn or damaged, replace them with new gaskets or apply a silicone-based sealant to ensure a watertight seal.
7. Reassemble the Light
After ensuring everything is dry and the seals are intact:
- Reinstall the bulbs into the light assembly.
- Reattach the light assembly to the vehicle.
- Secure all screws and panels that were removed.
Preventing Future Moisture Buildup
To prevent moisture from accumulating in your car’s lights again, follow these tips
- Regular Inspection: Periodically check the seals and condition of your lights. Early detection of wear and damage can prevent moisture problems.
- Sealant Application: Apply a silicone-based sealant around the edges of the light assemblies to reinforce the seals.
- Avoid Pressure Washing: Be cautious when washing your car. High-pressure water can force its way into the light assemblies if they aren’t perfectly sealed.
- Park in Covered Areas: Whenever possible, park your car in a garage or under a cover to minimize exposure to rain and snow.
- Replace Damaged Parts: If you notice any cracks or chips in the light assemblies, replace them promptly to avoid moisture entry.
Moisture in car tail lights and headlights can be a problem, but with the right access, it’s a problem that can be easily managed. By following the steps outlined in this guide, you can remove existing moisture and take provision measures to keep your lights clear and functional. Regular maintenance and inspection are key to preventing future issues, ensuring your vehicle remains safe and your visibility uncompromised.
You can also read other articles
Enhancing Your Driving Experience Installing a Sunroof in Your Car
How to Choose the Right Car Insurance Coverage for Your Needs

0 Comments